Wednesday, October 20, 2010

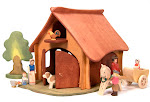
Mama West Wind Wooden Peg Gnomes


Meet Nicolae, Adela, and Vlad - the Waldorf Forrest Gnomes!


I was lucky enough to win one to celebrate the opening of Mama West Wind's etsy shop in May, which can be found here. We were so excited that we ran online to purchase two more. My girls and I think they are just darling. They are made with upcycled felted wool and wood pegs. You can see some of the other darling ones that Becca sold here. They are very child friendly, adorable, and I love that Mama West Wind is reusing wool :)

I wanted to wait to blog about them until the weather turned slightly cooler and now the gnomes have come out from underground to gather the seeds that they will nurture during winter!


Becca has a lovely blog that can be seen here. She is a very creative momma of two of the cutest little guys around and has been featured on The Crafty Crow here!

Saturday, October 16, 2010

Grade 2: LA Block with Fables - The Fox & the Grapes


October brings us a slight chill and a bit of rain (how welcomed!) and it also brings us back to Language Arts lessons. This month, our vehicle is Aesop's fables and here are some pictures to share...

First of all, I decided to start off with one of my favorites as a child, "The Fox & the Grapes". Attitude is everything in life and learning to be gracious, honest and humble just can't be underestimated, especially in today's world.

I started a new tradition this year (and will photograph it next week) - but I have decided to add the magic of a *storyteller's chair*, along with a *storyteller's shawl*. When the girls see me putting it on, they know a tale is about to begin :)


I hid my chalkboard drawing under a silk, and we followed the three day rhythm. I introduced the story on the first day, we retold it together the second day, and the third day, the girls each got to retell it. I pulled out my trusty playscape and a needle felted fox. We pretended the tree was really a vine and I quickly stuck a blob of purple on there to represent our grapes...


When it was the girls turn to retell the story, they took turns, and put on the storyteller's cape. They also wanted to wear a storyteller's babushka (we are part Polish, after all :)! The girls had so much fun - boy did that fox go flying all over the place trying to get those juicy grapes!


After the story was told, on Day 2, I revealed the chalkboard drawing and we began to copy it into our MLB's. This year, I find that they have more control and more patience over their fingers and drawing, so while last year, I allowed them to use various colors for their drawings, this year, we are focusing on using just the three primary colors and blending. While it may be ideal to start with just the primary's in Grade 1, as homeschoolers, I found I had to do more coaxing than I would have if the girls were under a teacher they didn't really know. They are ready for this challenge and I was very pleased with how their drawings turned out.


We also wrote a summary together to copy down onto another blank page in our MLB's.


Both of the girls need work trying to stay in a line and sometimes the letters still get away from us. Using the stick crayons to write words is harder than using a pencil, so I am taking that into account, as well. And perfectionism isn't pushed - just doing the very best you can do at this moment is what I usually stress. And I often point out errors I make (my fox's head is too small - oh look, I will try to make it a little bigger)!


And, of course, in the style of Earthschooling, who could forget to bring the grapes - for multisensory fun! They look a little mealy here, but they tasted good - lol! I stood on a chair and held the sprig up high while the girls jumped for them like the fox and giggled all the while!


We took the time to think of words that rhyme with *fox* and they saw how "ox" and "ocks" makes the same sound!


And another fun way to encourage writing, spelling, and reading, is to have the kids create their own mail boxes out of old cereal boxes or shoe boxes. They cut up paper bags and we taped them on and then they painted designs, and we even made little flags for them, so they know when they have mail!


My hubby works late, so this has been a fun way for them to connect with him during the day. They receive and leave messages for him and get all excited to see when the flag is raised!

We actually did this exercise when they were very little and they would draw things for him, but now it's so fun that they can write little notes. I even got a few lovely ones, myself - and some fun Michaelmas and Halloween drawings!


We went on a bunch of field trips over the last two weeks, so I'll share a few shots from them in my next post - some really fun local places to see!

Friday, October 15, 2010

Needle Felted Ghost Tutorial - Finally!


'Tis the night when up in the sky
You might see a ghost come gliding by,
Fear not, he is friendly you see
For once he was human, like you and like me!


So finally - here is a very easy tutorial on making some cute Halloween ghosts to hang in your home - or outside on a special Halloween tree! You will only need a few supplies:

~ white wool batting or wool roving
~ a tiny bit of black wool roving
~ a needle felting foam pad (or a thick sponge works, too!)
~ a needle felting needle

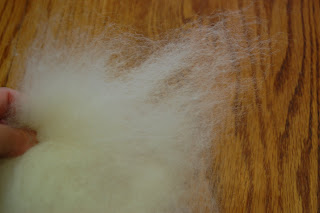
I wanted to show the difference between different batches of wool batting. This is from a newer batch and it is great for stuffing dolls. It is very thick and has tiny balls of wool in it...


Whereas this batch below is more like roving, but I also bought it as wool batting. Batting is cheaper than roving, so it's great to use it when you can. If it is too chunky, you can always try to felt it a bit and then pull it apart and I will have more of a long-like sheet which works well for these ghosts.

Step 1: Make a ball.


Place a section of the wool on your mat and start to roll it up, rolling the sides into the center of the ball and then needle felt into place.


Hint: if you'd like to involve your children, this would be a great part for them to do, but instead of needle felting this ball, you would have them wet felt it. There are many tutorials available online that can show you how! This one is quick and to the point and explains how to do it around an existing ball or with just wool (what I recommend for waldorf).

Step 2: Cover the ball with a tuft of wool.


Place it inside of the tuft of wool and hold your fingers around it and give it a few good pokes with the needle so that the outside layer felts to the ball inside. You don't have to overdo it - this ghost looks best airy so less is better - plus the eyes will keep it in place : )


Don't be afraid to really play with the wool and arrange it so that it looks right. Needlefelting and wool is very forgiving so if you make a mistake, you can usually fix it without having to start over!


Once I have the basic shape, I like to give a few punches with my clover needle - you can just use a single needle - this one is just faster as there are five needles in the punch.


Step 3: Put on the eyes (optional).


Waldorf is known for its simplicity, so by all means - if you don't want any facial features on your ghost, skip this part. Just make sure that the ball is securetly needle felted inside the outer layer. If you end up attaching string (covered below) that will hold your ghost together, too!

You only need a tiny bit of black wool. Separate two equal parts and simply roll the wool in your fingers to form a tiny ball.


Then place the ball in the position you'd like the first eye to be.


And needle felt it into place. Be sure you don't push the needle down too hard or it will go through the ghost and you might pull some of the black to the other side so it actually shows on the back of the ghost. The barbs are at the top of the needle, so you never have to go all the way down for it to grab the fibers and felt.


And voila! You're done! Wasn't that easy!


Now, if you'd like to hang them, it's pretty self explanatory, but just in case, here's what I do. Mine will go outside on a tree, so I've decided to use black thread which will be hidden when it's dark outside, giving the ghosts a floaty feel. Double thread it.


Go in from the inside/bottom of the ghost (where you made your initial ball).


Come up through the top and go back down again.


When you come out the bottom, thread the needle through the initial stitch, so that it's actually knotted onto your original stitch. This will help it from sliding off if it gets pulled in the wind or if a child grabs at it.


Then head back up through the bottom to the top once more.


It should look like this.


And then cut the loop and knot it at the appropriate height, cutting off the excess thread.


Now he's ready to fly!


There's no limit to where you can hang them! Whether it's somewhere inside the house, on a tree, or even (one of my fav's) wind it/tie it onto a long stick that your child treasures and they can fly their own ghostie around!


They will twist and turn and spin at even the slightest change of air pressure!


These would make great party favors for anyone having a Halloween birthday party or a class party!


Can't wait to see them when it gets dark out! Until then - happy early Halloween!


Hope you enjoyed!