'Tis the night when up in the sky
You might see a ghost come gliding by,
Fear not, he is friendly you see
For once he was human, like you and like me!

So finally - here is a very easy tutorial on making some cute Halloween ghosts to hang in your home - or outside on a special Halloween tree! You will only need a few supplies:
~ white wool batting or wool roving
~ a tiny bit of black wool roving
~ a needle felting foam pad (or a thick sponge works, too!)
~ a needle felting needle
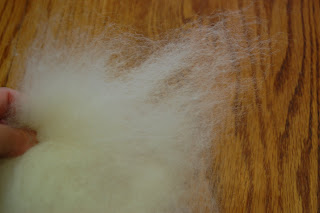
I wanted to show the difference between different batches of wool batting. This is from a newer batch and it is great for stuffing dolls. It is very thick and has tiny balls of wool in it...

Whereas this batch below is more like roving, but I also bought it as wool batting. Batting is cheaper than roving, so it's great to use it when you can. If it is too chunky, you can always try to felt it a bit and then pull it apart and I will have more of a long-like sheet which works well for these ghosts.
 Step 1: Make a ball.
Place a section of the wool on your mat and start to roll it up, rolling the sides into the center of the ball and then needle felt into place.

Hint: if you'd like to involve your children, this would be a great part for them to do, but instead of needle felting this ball, you would have them wet felt it. There are many tutorials available online that can show you how!
This one is quick and to the point and explains how to do it around an existing ball or with just wool (what I recommend for waldorf).
Step 2: Cover the ball with a tuft of wool.

Place it inside of the tuft of wool and hold your fingers around it and give it a few good pokes with the needle so that the outside layer felts to the ball inside. You don't have to overdo it - this ghost looks best airy so less is better - plus the eyes will keep it in place : )

Don't be afraid to really play with the wool and arrange it so that it looks right. Needlefelting and wool is very forgiving so if you make a mistake, you can usually fix it without having to start over!

Once I have the basic shape, I like to give a few punches with my clover needle - you can just use a single needle - this one is just faster as there are five needles in the punch.
 Step 3: Put on the eyes (optional).
Waldorf is known for its simplicity, so by all means - if you don't want any facial features on your ghost, skip this part. Just make sure that the ball is securetly needle felted inside the outer layer. If you end up attaching string (covered below) that will hold your ghost together, too!
You only need a tiny bit of black wool. Separate two equal parts and simply roll the wool in your fingers to form a tiny ball.
Then place the ball in the position you'd like the first eye to be.

And needle felt it into place. Be sure you don't push the needle down too hard or it will go through the ghost and you might pull some of the black to the other side so it actually shows on the back of the ghost. The barbs are at the top of the needle, so you never have to go all the way down for it to grab the fibers and felt.


And voila! You're done! Wasn't that easy!

Now, if you'd like to hang them, it's pretty self explanatory, but just in case, here's what I do. Mine will go outside on a tree, so I've decided to use black thread which will be hidden when it's dark outside, giving the ghosts a floaty feel. Double thread it.

Go in from the inside/bottom of the ghost (where you made your initial ball).

Come up through the top and go back down again.

When you come out the bottom, thread the needle through the initial stitch, so that it's actually knotted onto your original stitch. This will help it from sliding off if it gets pulled in the wind or if a child grabs at it.

Then head back up through the bottom to the top once more.

It should look like this.
And then cut the loop and knot it at the appropriate height, cutting off the excess thread.

Now he's ready to fly!

There's no limit to where you can hang them! Whether it's somewhere inside the house, on a tree, or even (one of my fav's) wind it/tie it onto a long stick that your child treasures and they can fly their own ghostie around!
They will twist and turn and spin at even the slightest change of air pressure!
These would make great party favors for anyone having a Halloween birthday party or a class party!

Can't wait to see them when it gets dark out! Until then - happy early Halloween!
Hope you enjoyed!




 Posts
Posts