

Saturday, October 24, 2009

Autumn Dolls


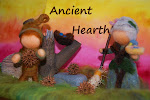
In preparation for our Autumn celebrations, we have been making various dolls. Kits for the pumpkin and corn cob dolls can be found at A Toy Garden here. And the witch was purchased from Magic Cabin here.

After studying the witch doll, I decided to try my hand at making a small fingertip type of doll and will share the tutorial. It was my first one and I didn't have a clue what I was doing (lol) but learned a lot along the way!

Needed Supplies for an autumn fingertip doll:
- pipe cleaner
- embroidery floss in desired colors
- needle/thread
- wool roving in desired color and a felting needle
- cotton doll skin in desired color (or make your own by dying a cotton t-shirt in tea leaves)
- wool felt in desired color

My doll's body wasn't long enough, so next time, I will not cut the pipe cleaner down. Twist the pipe cleaner into shape, then untwist and wrap the embroidery floss around the folds of the arms and legs to prevent the wire from popping out and possibly cutting small hands. The whole body can be wrapped in the embroidery floss for a better look, but I was trying to stretch the supplies, so I tied off early.

Next, take some plain wool roving and wrap it around the head, needle felting into place.


Cut a scrap of doll skin to place over the wool roving and secure into place with string. Note: this is where I messed up by not making the skin bigger. I also should have used dental floss to tie off as it seems to hold better than the string I used.

Once the skin is secure, take embroidery floss or even regular thread and make the eyes and mouth by going all the way through the head to the back. Don't worry, the hair will cover the thread that is showing in the back.

Once the features are in place, take your wool roving and gently needle felt it onto the head.

Cut and design your outfit and stitch it into place!

And voila! You have a cute little finger tip Autumn Doll!

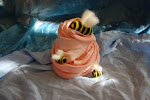
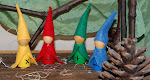
Here she is with her friends. And below is an Acorn Gnome that I designed using pipe cleaners and wool roving. I needle felted the acorn to go into a real acorn cap and was able to secure the gnome's hands to the acorn by felting.

Hope you give it a try & have fun! We are loving all the creativity in Waldorf.

Friday, October 23, 2009

First Grade: Language Arts Block (Con't)

Here is a continuation of our LA Block. I didn't record all the 6th sense tie-ins, but will try to record things better in the future. I am including a lot of pictures of our MLB's to provide a lot of visual, which some people might find helpful :D

W - "The Fisherman and His Wife" by Bros. Grimm

While our chalk and white board drawings incorporated waves, we decided in our main lesson books, to draw witches on a broom, as seen in the "Living Alphabet" book, which is out of print and has been replaced with the "Waldorf Alphabet Book".


C - "Cat and Mouse in Partnership" by Bros. Grimm


We smelled spices like Cayenne Pepper, Cinnamon, and Curry and ate carrots.


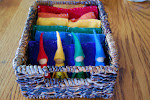
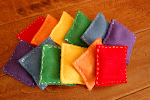
We also finally enjoyed our Crayon Pouches that I made for the girls. I found a free pattern online, but decided to use felt instead of denim and it was so thick when I turned it inside out that I scrapped it and played around until I found one to suit our needs for both block and stick crayons.

I ended up using three sheets of felt, a cotton cover, and yarn which we finger knitted to make the tie. I don't have a sewing machine so it was all done by hand. The girls chose their own colors.

And then we continued with our Language Arts block...


F - "The Lambkin and the Little Fish" by Bros. Grimm

We ate quite a lot of fruit and checked out Fennel seeds.
H - "The Hut in the Forest" by Bros. Grimm

Elena decided to draw a horse instead, inspired by Famke Zonneveld's illustration of "H" in "The Living Alphabet" book.

Charley drew a hut on her white board and a horse in her MLB.


J - "The Water of Life" by Bros. Grimm

We drew Jellyfish in our MLB's. After realizing that some of the illustrations are just too overwhelming for 6 year olds, I decided to try to make them a bit more simple. The Jellyfish was easy enough for them and much better than the drawing I did - lol!

We tasted some Jam and played by jumping around the room and jumping over sticks in the backyard.

First Grade: Language Arts Block (Con't)

B - "The Willow Wren and the Bear" by Bros. Grimm

G - "The Golden Goose" by Bros. Grimm

Taking suggestion from Kristie Burns' "Sixth Sense Language", we decided to do a watercolor painting of a goose in the shape of a G.

Pictures of our Main Lesson Book drawings...

For lunch, we had grapes and made homemade garlic bread, smelling the garlic. We also read "The Harvest" poem by A. Henderson from Wynstone's "Autumn" book.

K - "King Thrushbeard" by Bros. Grimm

The girls and I absolutely LOVED this story. We had a lot of fun retelling it over and over again. The girls drew King Thrushbeard into the letter "K".
Here is Elena's King before she added background to her drawing.

And my drawing...


R - "Rumpelstiltskin" by Bros. Grimm

We smelled Rosemary Leaves, ate red peppers, raisins & red tomatoes.

Charley drew rabbits instead of Rumpelstiltskin.

Elena drew Rumpelstiltskin.


L - "Louise Ladybug Looks for Friends" by me

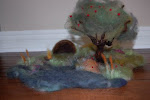
For the letter "L", again, I didn't find a Grimm's tale that I was happy with, so I set up a scene and made up a story using three ladybugs we had needle felted in kindergarten.

The story was about a little ladybug who lived alone in the desert and went in search of others like her. She came to a stream that went up a mountain, followed it to the top and met King Winter on the top of a snow crested peak. He told her to go back down stream and search west for the Pinecone Forest where she would meet another who would take her to a land where ladybugs dwell. So Louise did and in the Pinecone Forest, she met Lucy Ladybug and the two of them traveled north to a fertile forest where they met Linda Ladybug and the three lived happily ever after with the woodland animals in the Lush Forest.


D - "Saint George and the Dragon" by Margaret Hodges

For the letter "D", it couldn't have been better timed, but it fell on Michaelmas, so I read the girls the Hodges book and made our D's into Dragons.


It was a little too difficult for the girls, so they made their own drawings. This one is of a door...

And this one is a dwarf and a door, though the shape is backwards.

One of the girls drew ducks in this picture.

We also did some nature Drawings in the backyard, which I will post about soon!

This is as far as we got before our trip to Chicago, but more posts are coming about activities we did in between our main lesson block on Language Arts.