

Tuesday, December 22, 2009

Natural Suburbia Fiber Giveaway & Fun with Beeswax


The lovely and talented Linda of Natural Suburbia is having an amazing fiber giveaway at her blog here.

Enter it for a chance to receive some incredible goodies...


And now for our last few posts before Christmas...Fun with Beeswax:

The girls and I collected our supplies...we first went on a fun filled pine cone hunt at a local park...


We then got out our materials:
- tools (hammer and screw driver to break the beeswax)
- the beeswax itself - purchased here
- the wick, also purchased here
- some tart molds purchased here


And the fun began!


We used a double boiler. I had bought a nice pouring can from Paper Scissors Stone and it worked nicely for pouring, but it is very deep and I didn't have enough beeswax to make dipping of the pine cones easy. So eventually we switched to an old soup can which worked better and we didn't have to then clean out when we were done.

The girls dipped the pine cones in the wax and then we dipped them in a cool bowl of water. This was the way the pioneers would make their own candles - dipping the wick once in the wax, quickly removing, and then dipping the candles/wick in cool water to set quicker. So we decided to try this with our pine cones.


We then made the girls birthday candles (for a Feb birthday).


From there, we moved onto making those cute walnut candles so many have blogged about...see this amazing post from the ever-creative The Magic Onions.


We also tried them in the tart molds, but I'm having trouble getting them out - LOL! Perhaps I should have pierced mine with toothpicks....anyway, here are our outcomes:


The pine cone fire starters will be gifted to family members who love winter fires in the hearth. As the pine cone takes the fire, the beeswax melts and the fragrance is emitted - warm and soothing. More specific directions for the Pine Cone Fire Starters can be found in the Earthways book.


Happy Solstice week!

Monday, December 21, 2009

Advent Week 4 & Winter Solstice

Advent Week 4: The Human Kingdom
The fourth light of Advent,
it is the light of man.
The light of Love, the light of thought,
To give and to understand.

We added our beautiful Mother Theresa from the World Leaders Series made by the artists at Syrendell to our Advent wreath to represent a wonderful soul whom we aspire to be more like. This fourth week of Advent, we honor our mothers: Mother Mary, Mother Theresa, our own Mothers and Grandmothers, ourselves...

Winter Solstice begins tonight.

The gift of light I thankfully hold

And pass to my neighbor its shining gold

That everyone may feel its glow,

Receiving and giving may love and grow.

~Anon.

Wednesday, December 16, 2009

Advent Week 3 Gifts: Silhouette Transparencies


Light in the darkness of Advent is calming, healing and spiritual as we reflect on our many blessings, especially those of our children. I'd love to share a fun craft/gift that will certainly add to the beauty of your home. It is the silhouette transparency or triptychs.

They are not complicated to make and are very rewarding. We made ours using watercolor paintings (140 lb stock). After they dried, I put vegetable oil on them to set overnight to make them a little more transparent.


The next morning, I folded the two sides so the picture will stand freely in front of a votive candle.


Then on the back side, with a pencil, you can sketch your cut-out.


It is easiest to use a crafting knife, but for this one, I used a kitchen knife on a cutting board and some scissors. Be sure to keep a section of the bottom intact for stability and so that your designs are supported.


Once that is done, it's time to add the colors! You can use tissue paper or kite paper. Mine was done with kite paper. It is important to remember to go light to dark with your color schemes.

Using glue, attach your first color across the whole back of your design.


And then cut additional layers, as desired - again going from lighter to darker.


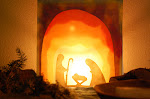
Once that is finished, set out on the table with a votive behind it and voila! You have a beautiful centerpiece for your seasonal table!


Now for something a little easier for the children, have them rip pieces of kite paper or tissue paper.


Attach a piece of white tissue paper or kite paper (this one is tissue paper) to the back of a simple cut out from one of their water color paintings. And then let them glue the shreds of paper on the back. A glue stick seems to work best, with no clumps of glue to be seen on the other side, however my twins insisted on working with tacky glue.


After the design is done, you can seal the back with another white piece of tissue or kite paper. The front doesn't look that great by itself...


But set it or hang it in front of a sunny window and you have a stunning creation by your little ones!


The possibilities are endless, but I'm sure Grandma would absolutely love a gift like this to hang in her window or in front of a votive for the holidays!

We had so much fun with this, that we are going to do seasonal transparencies and I've already completed our Winter scene for January:


Variations of these can be found in either "All Year Round" or "Earthways". I love and recommend both of these lovely books. Happy holidays!